Premiere Pro is a great professional video editor, but if someone new to it may find it be difficult to use. Editing options in the Adobe Premiere Pro are a little bit confusing for the first time. And trimming a video is also a big part of editing. In this article, we’ll talk about how to trim or cut a video in the Premiere Pro.
Trim can also be said as cut or split, all these are the same. Trimming a video cuts a video into two or more parts. You can make as many parts of a video using trim. Trim, splits a video from the point you want it to. You just need to place your mouse cursor over the video at the point of the video you want and it will do your work. Here’s how you can trim in Premiere Pro.
How to Trim Video in Premiere Pro
The interface can be slightly different on your computer as the Premiere Pro version can vary. But the steps are same.
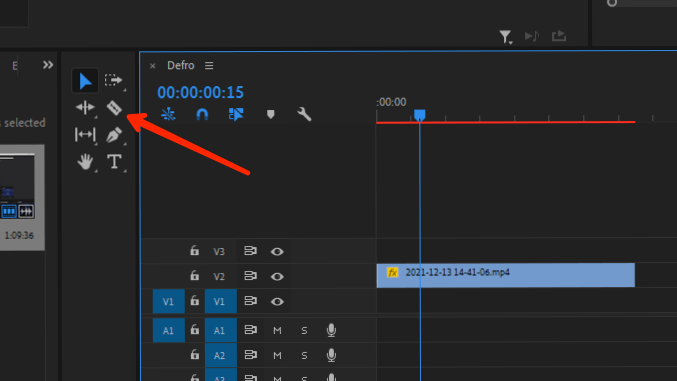
Add your video to the timeline, and select the “razor tool” to cut (trim) the video. Razor tool can also be triggered using the “C” key.

Be at the “editing” tab to use the “razor tool” to split (trim) the video.
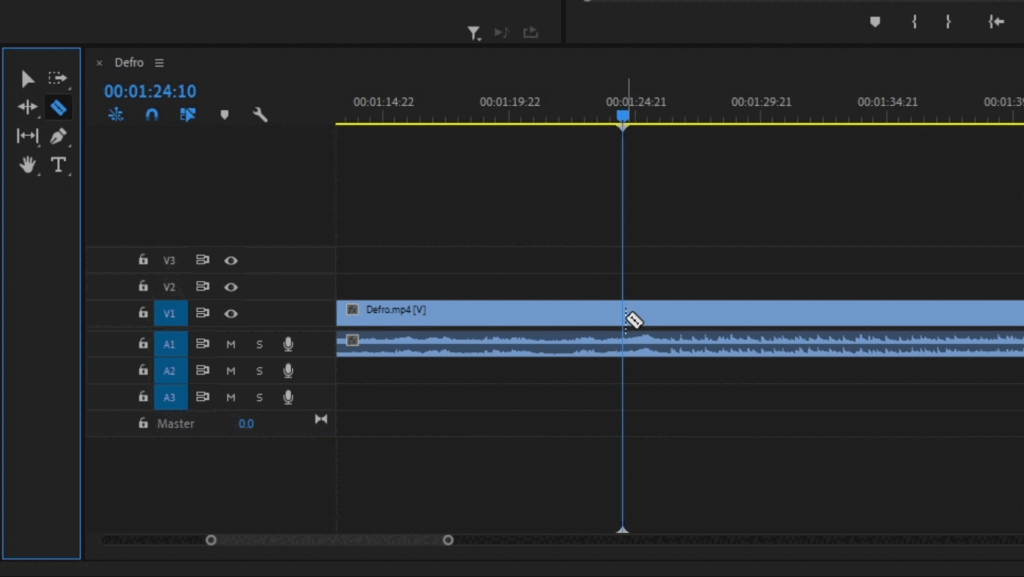
Now move your cursor over the video, you will now see a difference in the cursor shape, it more looks like a razor blade. Point over the video where you want to trim it. And right-click with the mouse.

The video will get split after you right-click on it with the mouse, make cuts as many you want. After trimming is finished, you can switch back to the normal cursor using the “V” key from the keyboard.
To delete the video part trim it and select the video by mouse click and click delete key.
This is how you can use the “razor tool” to trim the video and split it into parts. If you have further queries, then please leave a comment below. We will try to help you as soon we can.
Read More : How to Crop Video in Adobe Premiere Pro


