Not all videos components are useful for a video product, that is why it needs to be cropped out. So, that only essential components remained. Cropping video in Adobe Premiere Pro is simple than you thought of. Here we’ll take a look at how we can crop a video in Premiere Pro.
Table of Contents
Cropping a Video
Cropping removes the unwanted components from a video or it can also be used to make an object in focus or to make zoom if the object is far at a distance. This is a powerful tool that every video editor wants on video editor software.
Abobe Premiere Pro cropping technique is a little bit odd, but it makes it fun to crop in a video. Here’s how we can crop in Premiere Pro.
Related – How to Cut (Trim) a Video in Parts in Premiere Pro
How to Crop in Premiere Pro
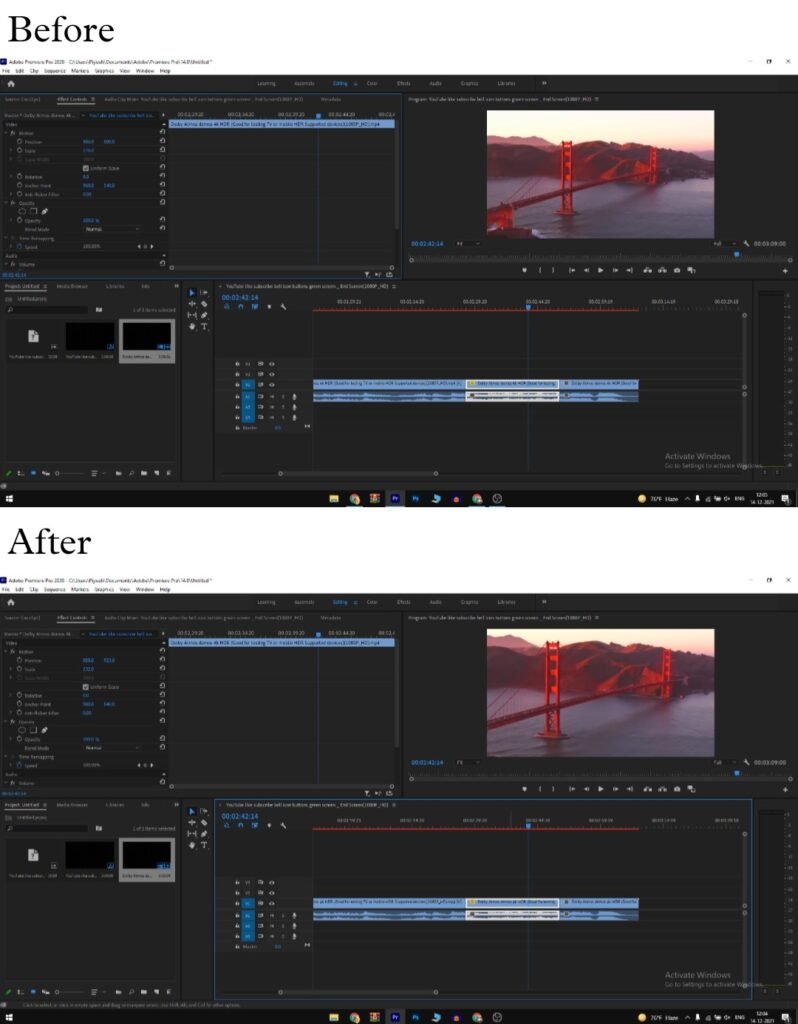
The cropping method is the same in Premiere Pro for both video and images. You can crop any video file using this technique. The premiere pro uses scale property to crop the video, later the particular part from the video can be adjusted at the position you want using the X and Y positions. Here’s how to do it.
Add your video to the timeline.
Now select the video from the timeline that you want to crop.

Now go to “effect control” panel, and there change the “scale” value according to how much crop you want.
Be at the “editing” tab for “effect control” panel.

Also, adjust the X and Y position to perfectly align the main object in the video. You can later increase or decrease the scale value.
Once you positioned and scaled the video properly as you want, you can continue your editing, no need to save or like that (CTRL + S will save the whole project).

This is how you can effectively crop a video as well as images in the Adobe Premiere Pro. For further queries leave a comment below.
Cropping an Image
Image cropping also works same as the video cropping and can be done using the scale and position properties. Select and image and change its scale and positions to crop it.
Read More – How to Compress Images in Photoshop


