Windows generate a lot of temporary files that get stored on the HDD or SDD on your computer system. And these temporary files really slow down your computer speed and can be a cause of interrupting any service which may result in lag or freeze of a program. In this article, we’ll see that how you can delete or clear these temporary files from your system.
What are Temporary Files in Windows Computer
Temporary files include browsing cache, history, recent files, feedback, error reports, windows notification, and a lot more similar things that are generated for short use, but these temporary files get stored on the storage for a long. Fortunately, these can be cleared. Temporary files are also referred to as TEMP data.
Deleting these temporary files will not remove any type of data that you have stored somewhere, which means it won’t delete useful files.
How to Clear Temporary Files (TEMP) From a Computer
To delete the “temp data” from a computer follow the below steps:
#1 Delete Temporary Cache Files
Open the start menu, and type “%TEMP%” and press enter to search.
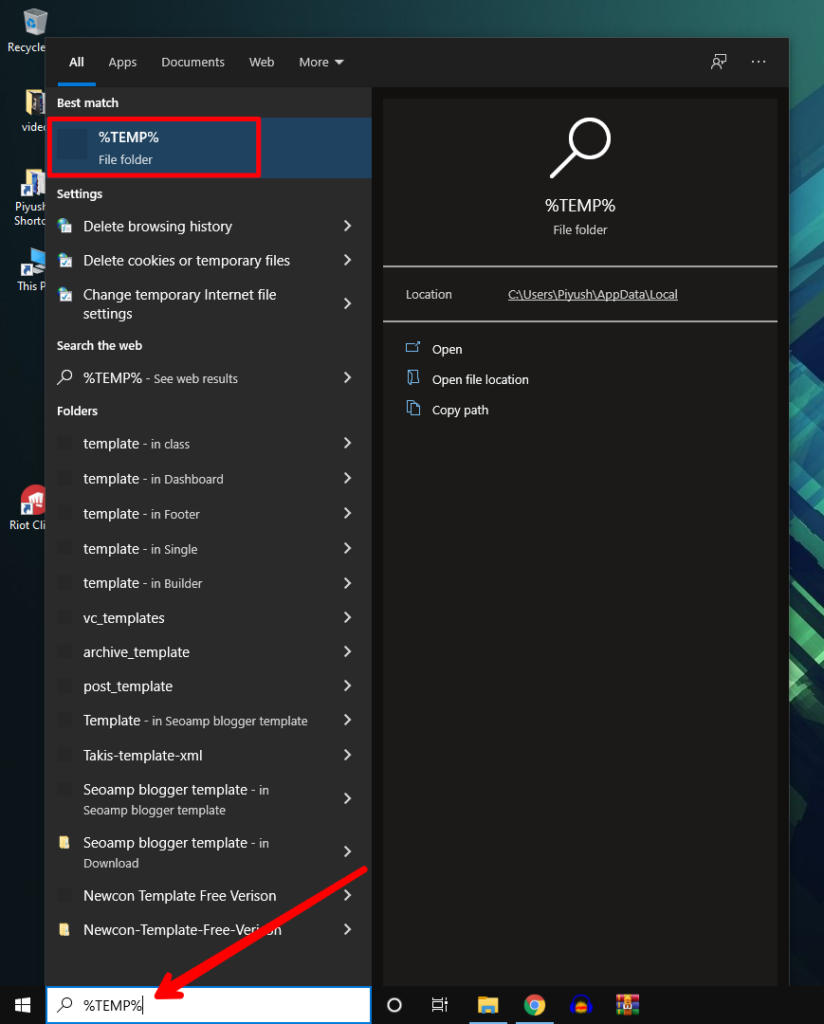
Now a new windows explorer’s window will open. All the files and folders shown there are temporary data/files.
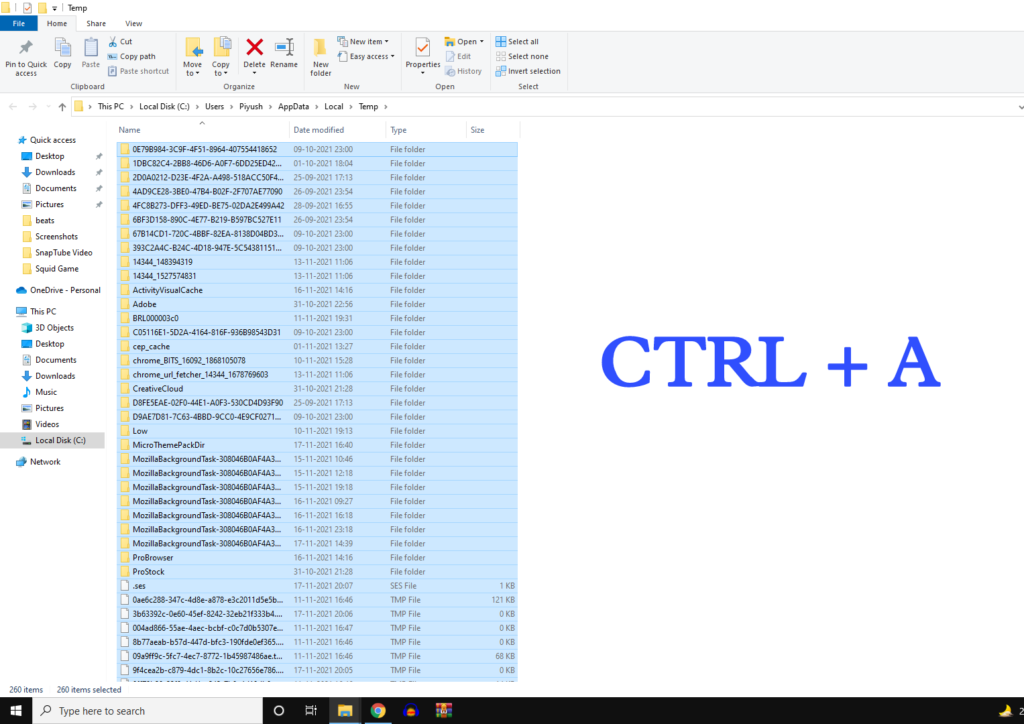
To delete them, press CTRL+A to select all, and then press the SHIFT+Delete key to delete them permanently from your computer. Shift+Delete won’t move the file to recycle bin, instead, it will delete instantly.
If any warning shows up saying are you sure to delete the files permanently then click “yes” to confirm the deletion.
#2 Delete Temporary Windows Files
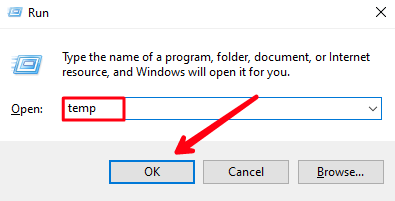
Open the start menu and search for a run, press enter.
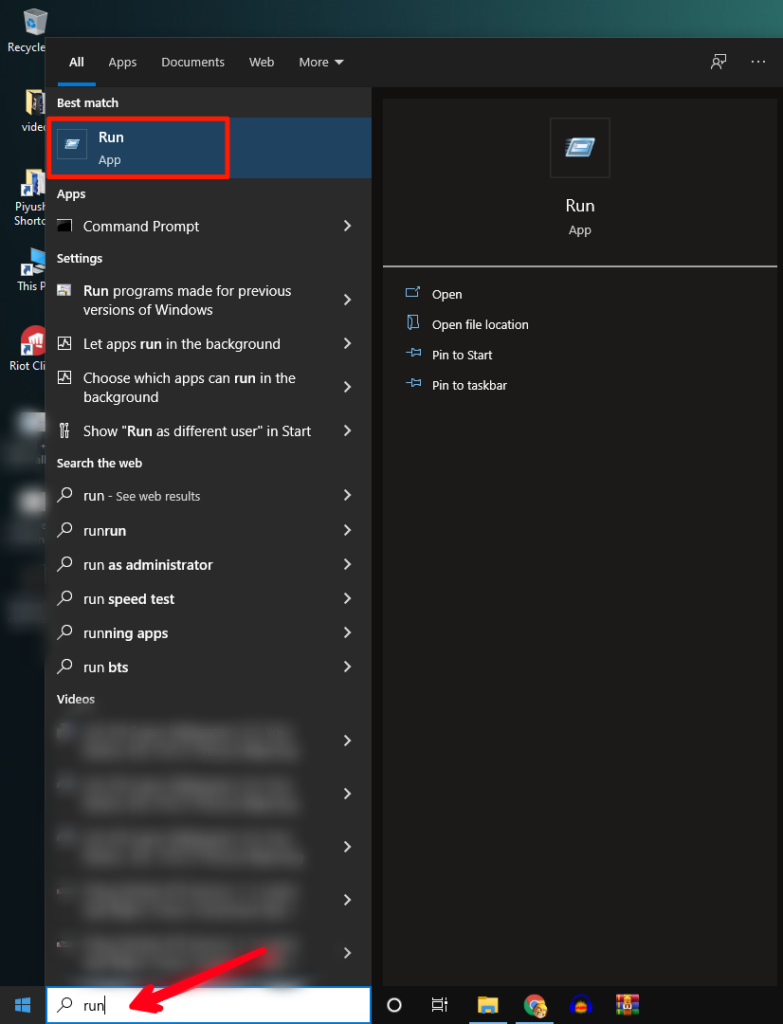
Now type “temp” and press enter.
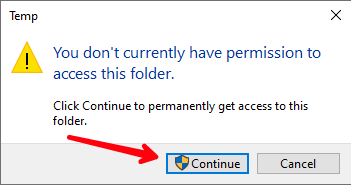
This will show all the Windows temporary files (may ask to “continue”).
Select all (Ctrl +A) and delete them (Shift+Delete).
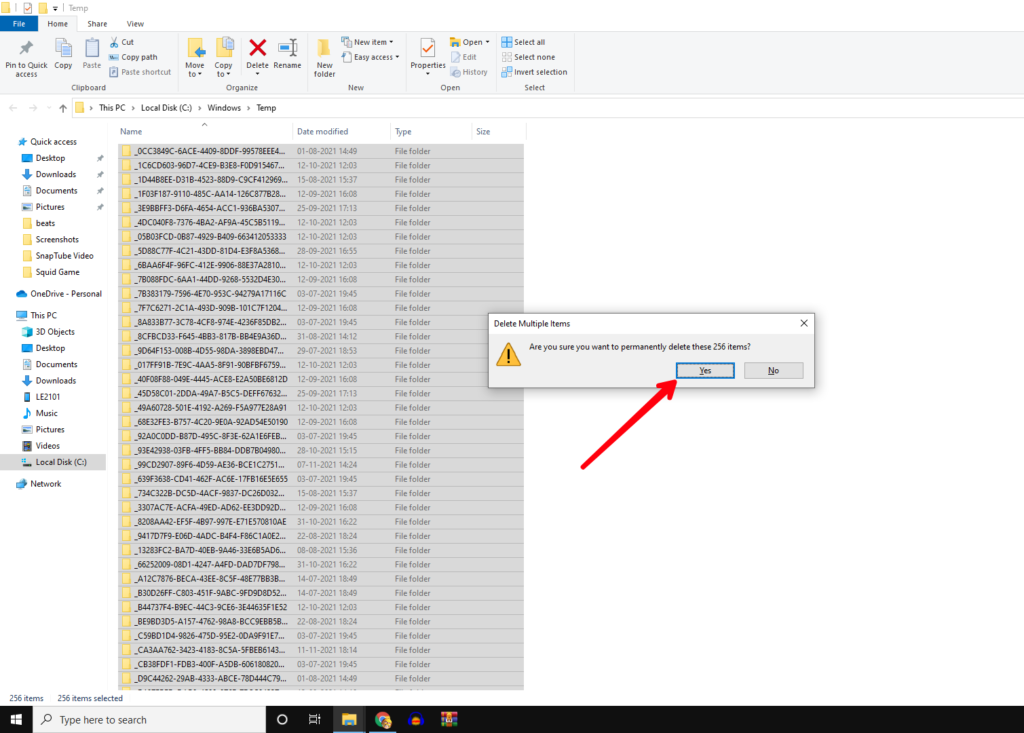
If any message appears saying this file cannot be deleted, just skip them and continue.
#3 Delete Prefetch Cache
Open run command again, and search for prefetch.

Select all the files and delete (SHIFT+Delete) them.
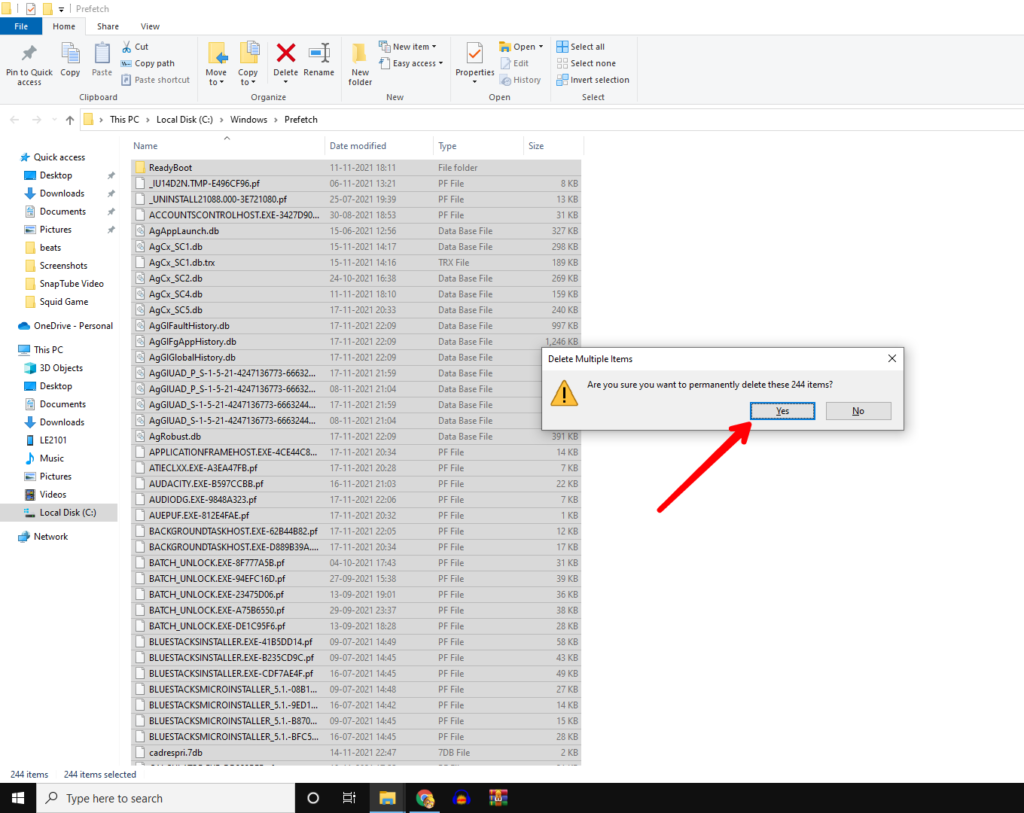
If any message appears saying this file cannot be deleted, just skip them and continue.
#4 Delete Windows Installation Files
Open the start menu and search for storage, press enter. Click on this PC.
This will show you all the storage used on your PC and the type of files consuming the space on your HDD or SDD.
Click on temporary files and there you will see an option of the previous version of windows, this is the size of the installation files that your older version of windows was using to run the system. These old files are now not necessary for the new windows you are using on your computer. Tick the box beside it and click remove files.
#5 Clear Software Distribution Download Folder
Whenever any windows application receives an update, these files are get downloaded to your system. But after the update completes and the application is on its new version these files still be there on the storage disk. You can delete them in order to save space.
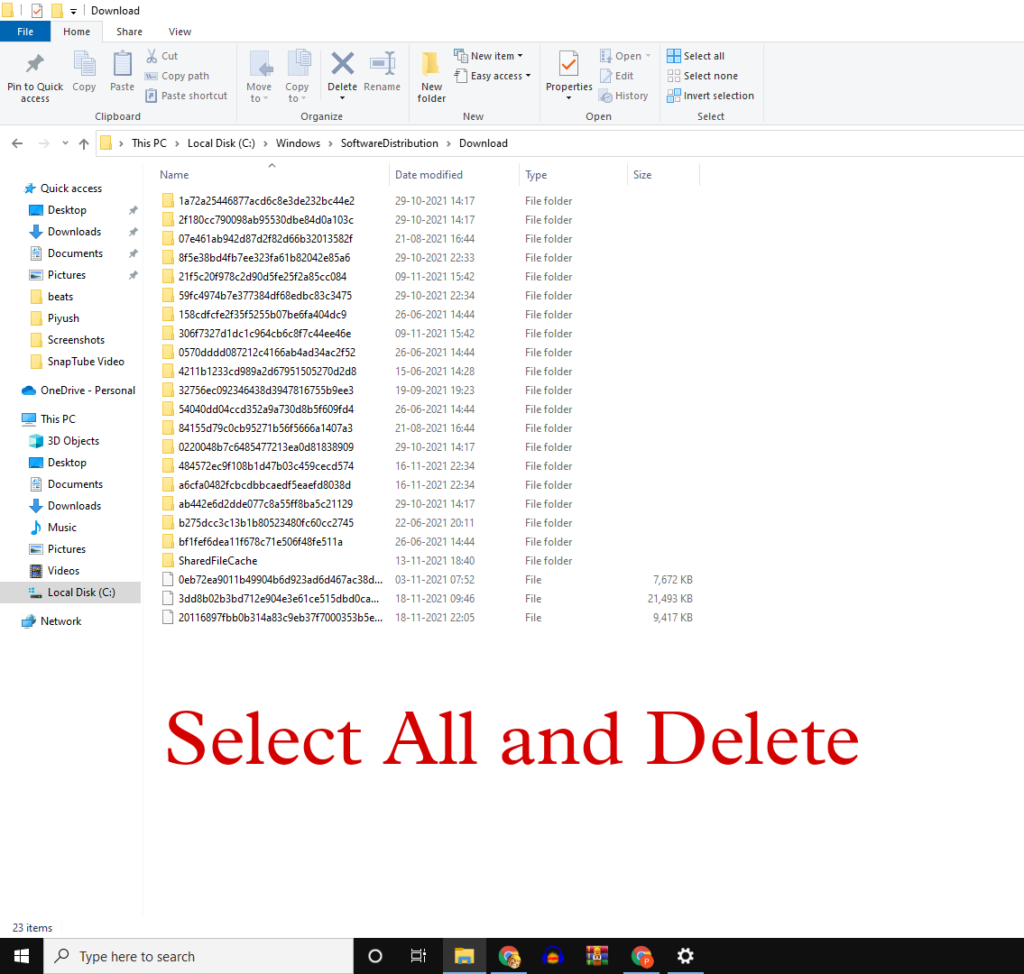
Open this PC, go to the local disk C. Then go to the windows folder.
Now search for a folder named software distribution. Then open the download folder.

Now select all the files and delete them (SHIFT+Delete).
#6 Disk Cleanup
This should be the last step after following all the above steps:
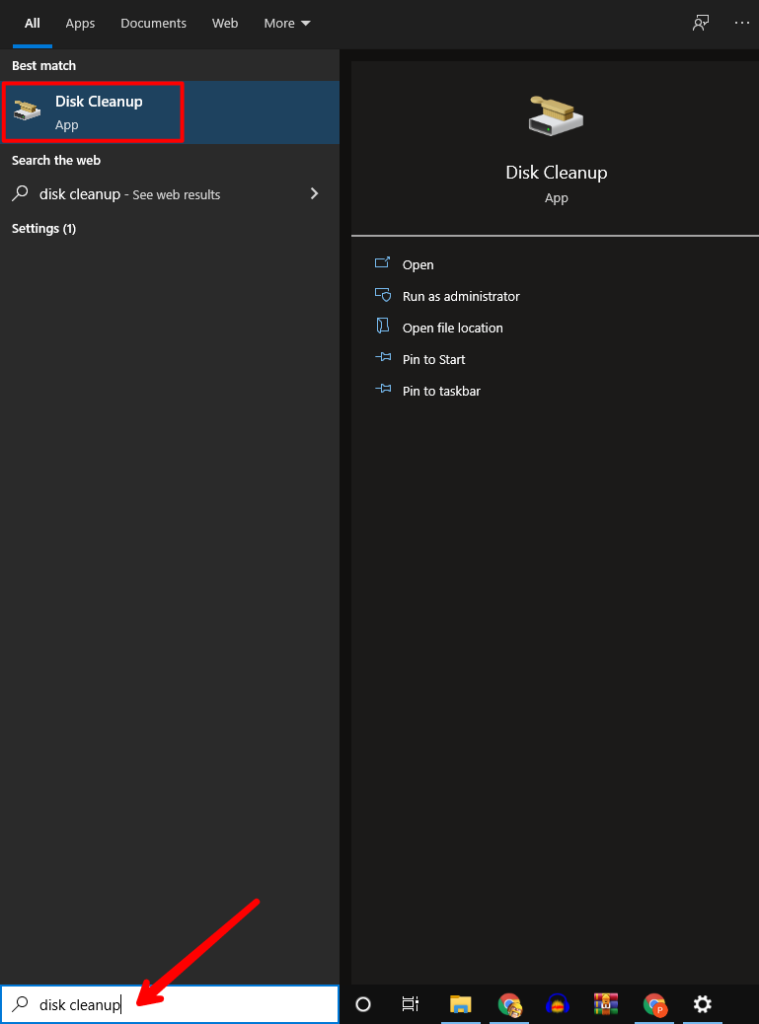
Open the start menu, and search for disk cleanup. Press enter.
Let it scan and calculate the disk space. Select the disk to clean.
Now a window with the different file type and their corresponding space on your disk, select the files that you need to delete, You can select them all to delete, nothing to worry.
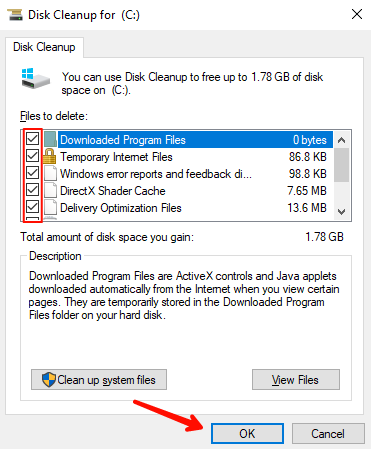
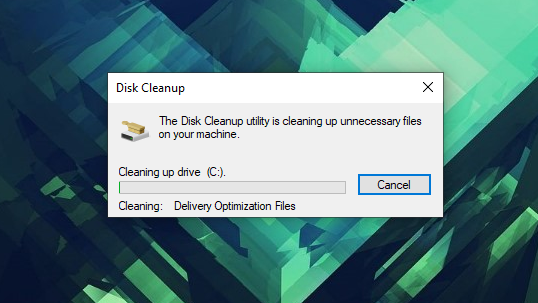
Click ok, it will ask for confirmation, click delete files to continue. It will take some time, let it be complete. After a few seconds, it will delete all the temporary files from your computer.
Leave a Reply